Lightning Web Components File Upload Example
Lightning Web Components make file uploading a very simple process. If you are from any other programming background you will get to know that file uploading is one of the tedious thing to code.
Lightning Web Components make file uploading a very simple process. If you are from any other programming background you will get to know that file uploading is one of the tedious thing to code.
But in Lightning Web Components it's as simple as using a button tag and rest everything is taken care of by the framework. In case you want to modify the characteristics of the file uploading component then all we need to do is play around with the attributes of the tag and we are done.

Here's the sample code related to <lightning-file-upload></ligntning-file-upload> lightning web component.
<template>
    <lightning-file-upload
            label="Attach receipt"
            name="fileUploader"
            accept={acceptedFormats}
            record-id={myRecordId}
            onuploadfinished={handleUploadFinished}
            multiple>
    </lightning-file-upload>
</template>
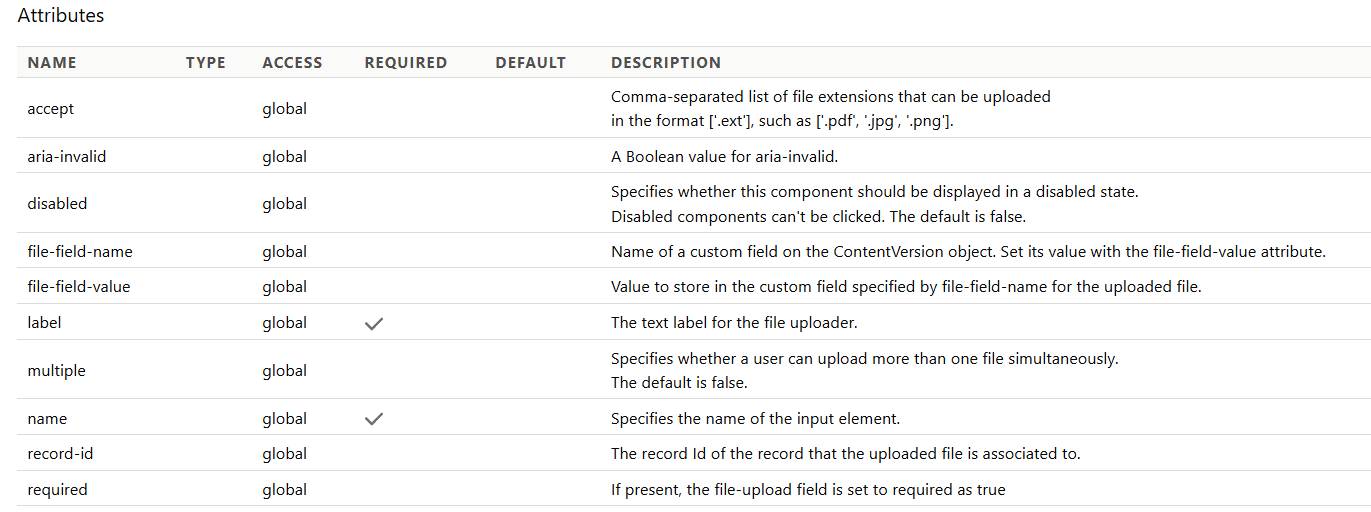
Now let's look at the attributes of the tag.
`accept` → We can specify the formats of the files that this Lightning Web Component can accept.
`recordId` → This is the file underwhich the file will be uploaded.
`onuploadfinished` → Once the file is finished in case you want to have some custom business logic, something like shown a Toast message or updating an object we can have that business logic in this method.
`multiple` → This indicated that the user can upload multiple files and not just one file.

This is how the JS controller of the Lightning Web Component is going to look like.
However, there are a few limitations that you need to consider ..
- You can upload simultaneously upto 10 files where as the org limit is a maximum of 25 files.
- Each file cannot exceed more than 2GB file.
- We cannot use this component in Lightning Out and standalone apps.
Hope this was helpful!